QR codes are everywhere in our daily lives from online payments to leaving reviews at stores or restaurants. These little squares can store small but useful amounts of data. For example, they can contain a short text message or a numeric identifier, like “Hello World” or 12345678.
In this article, we’ll explore how QR codes work and how we can use them for specific automation tasks using Python and Discord’s API.
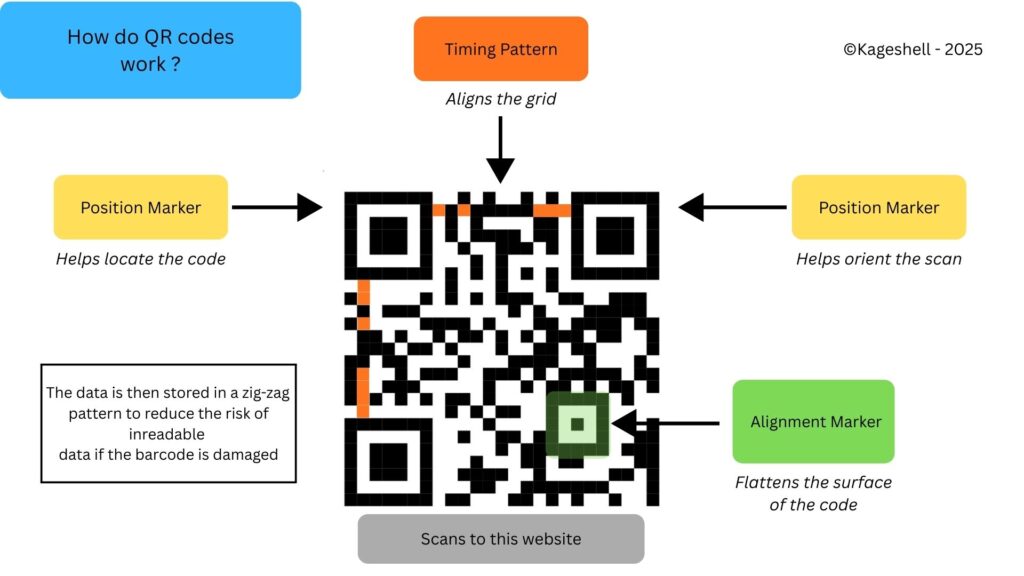
QR code, short for Quick Response code, is a type of 2D barcode made up of small black and white squares (called modules). It has three larger squares in the top-left, top-right, and bottom-left corners, which help scanners detect and read the code accurately. One advantage of QR codes over traditional barcodes is that they can store significantly more data.
Here how it’s built :
Why three position markers ?
The three large squares located in the corners of a QR code are called position markers. Their main purpose is to help the scanner determine the orientation of the code. Whether the QR code is scanned upside down, rotated, or at an angle, these markers allow the scanner to understand how the code is positioned and read it correctly.
They also help define the boundaries of the QR code. To do this accurately, QR codes use timing patterns—the alternating black and white lines that run between the corner markers. These patterns act like a ruler, allowing the scanner to determine the size of the grid and the spacing between each square.
Another important component is the alignment marker. This marker does not appear in smaller QR codes due to space limitations, but becomes increasingly important as the QR code grows in size and complexity. Its role is to compensate for distortion, allowing the QR code to remain readable even when printed on curved or non-flat surfaces.
Once the structural elements are in place, the actual data can be added. QR codes store information in black and white squares, which represent binary data that the scanner can read. One of the key strengths of QR codes is that they can remain readable even if part of the code is damaged. This is made possible through error correction, which exists in four levels: Low (7%), Medium (15%), Quartile (25%), and High (30%). The data and error-correction information are distributed across the QR code in a zigzag pattern, allowing the scanner to recover missing or corrupted information.
Implementing this technology for a stupid project
Where I eat as a student, we have to scan QR codes in order to have lunch. Each code represents a student or a teacher at the facility. With a group of friends, we tried reverse-engineering how these codes worked. We discovered that they were simply 8-digit numbers, such as 05671879.
At first, we thought there might be a pattern behind how the codes were generated. It turned out there wasn’t—some codes started with a 5, others with a 0 or an 8, and the distribution seemed fairly random. We then did the math to estimate the probability of randomly finding a valid code: about 1 in 100,000 (0.00001%), assuming roughly 1,000 users. The odds were low—very low.
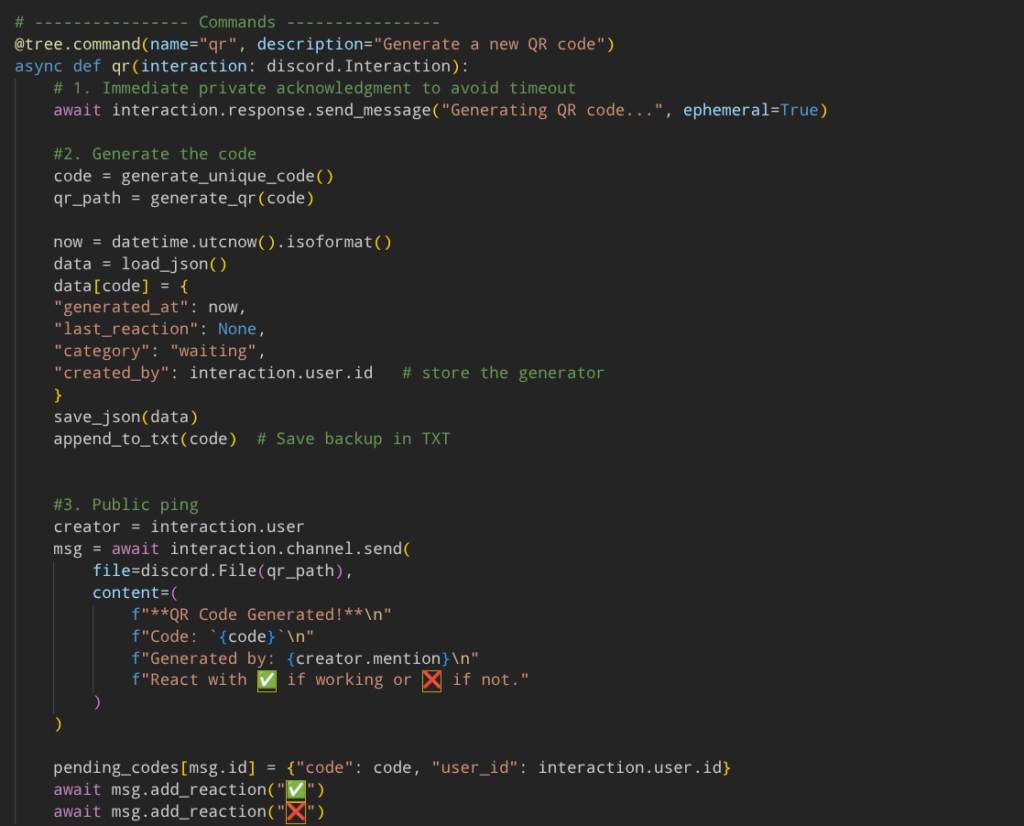
Still, that didn’t stop us from experimenting. During the first few months, I wrote a Python script that generates a unique 8-digit number (to match the scanner’s required format) and converts it into a scannable QR code.
How does the algorithm work ?
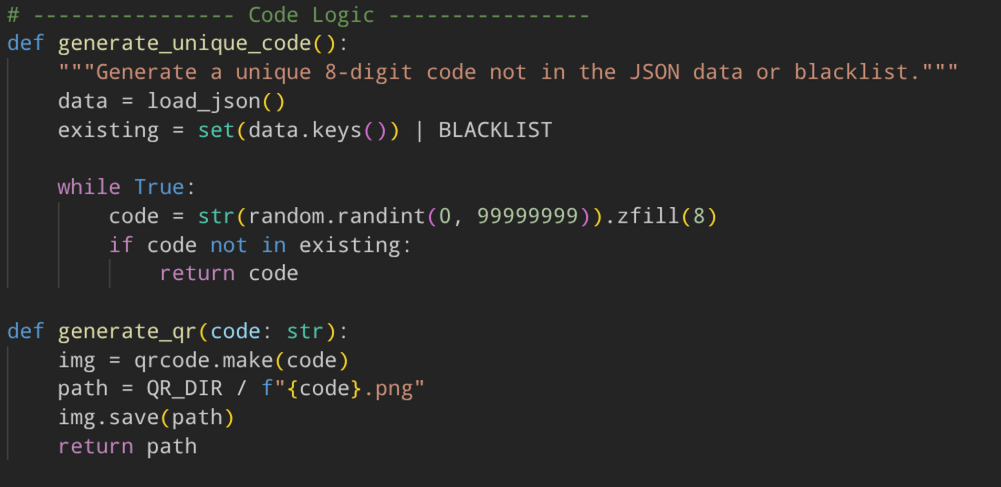
The first function loads a json file containing each code that has already been generated (details in the next paragraph). It also takes notes of a blacklist that is made of my own code and my friends’ code. This allows the rest of the code to generate a new unique 8 digit string that isn’t in one of those lists. Thanks to this filtering, each time a new code is generated, the probability of finding a working one increases slightly (though not by much). The second part of the process is generating the QR code itself, using a Python library called qrcode
JSON formatting
JSON (short for JavaScript Object Notation) can be quite daunting at first glance. You need to make sure you have the correct number of brackets and commas; otherwise, part of your data may become unreadable. However, if you know Python, JSON works exactly like a dictionary: a set of keys paired with values.
For our experiment, the number we’ve just generated acts as the key, and it links all of its properties, such as the date of generation, the person who generated it, and its category (working code, not working, or waiting for approval).
When you put it all together it looks like this :
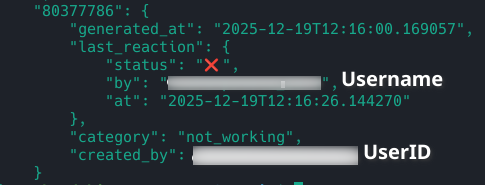
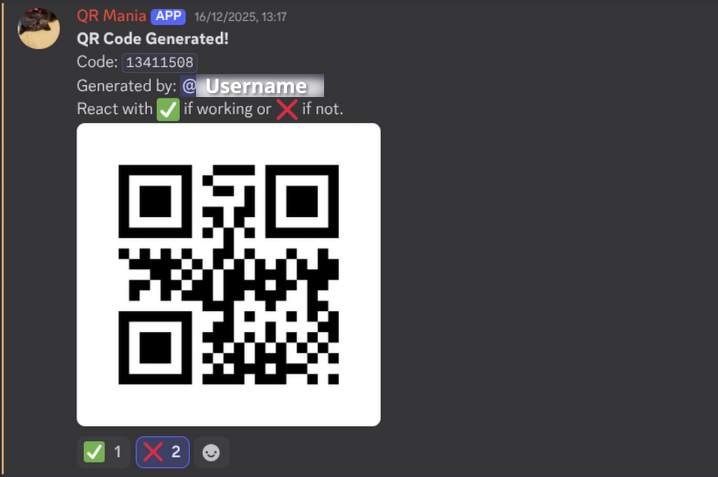
The status is the reaction given on discord like a red cross or green tick along with the username of the generator and the time of last interaction. Because you can change usernames on discord, i’ve decided to implement an extra setting that links unique user ID given to each discord account that has been created in case one of my friends decides to modify his account’s name.
Implemeting the python script as a Discord bot
Once the algorithm and data structures were in place, the next step was to make the project more accessible to non-coders. At first—since this was just a fun experiment to test QR codes—I didn’t create a way for my friends to generate their own codes. Instead, I generated the codes for them and sent them over using my trusty Python script and Termux (a mobile Linux terminal).
This approach quickly proved ineffective. I had to manually maintain a list of codes that didn’t work and constantly ask my friends whether they had tested their QR codes. That’s when I decided to build a Discord bot to make the process easier, more independent, and accessible to everyone.
I already had a basic structure in mind and a rough idea of how to implement it, but the actual implementation turned out to be more challenging than expected. You need to manage a set of commands, ensure the bot starts automatically, keep track of every generated code, and explain how everything works to users.
To keep things simple, I won’t dive too deeply into the technical details of the bot. Instead, here are the three main components we use:
- Discord’s API
- Asynchronous coding (so that every function can run indepedently at the same time)
- Automating the bot’s startup
Discord API
Discord’s API allows developers to build extensions for Discord. One of the most common extensions is bots, which give you the ability to run custom commands directly in a chat. In my case, the bot generates QR codes for my experiment and reacts to messages to update their status (working or not working).
The API itself is free to use, although hosting the bot is not always free. Some platforms let you build a bot without any coding experience by using block-based systems (for example, BotGhost). However, on their free tier, there are limited options for generating QR codes, and the block structure can be difficult to understand.
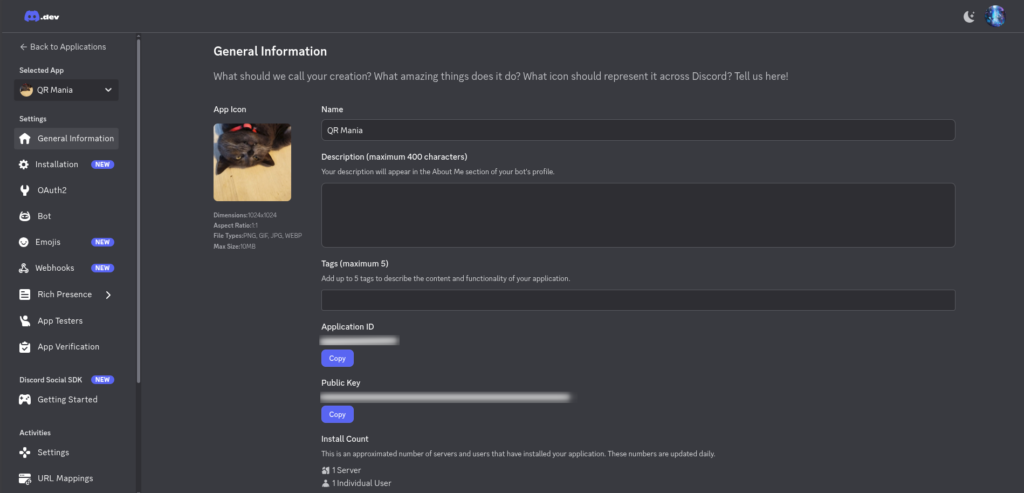
Because of this, I decided to use my Python skills to code the bot manually and host it on my home server (a future post will cover this in more detail). Creating the bot is fairly straightforward: you log in to the Discord Developer Portal, go to the Applications section, click Create Application, give it a name, and you’re done.
The final step is to link your bot token, which can be found in the Bot section. This token must be kept secret—otherwise, someone could take control of your bot.
Running multiple tasks at the same time (asynchronous coding)
In order to run different commands that can be used by everyone at the same time, you need to be able to execute multiple tasks (or functions) continuously. This is where Python’s async functionality becomes very useful. It allows tasks to run without blocking the execution of other code, such as saving a new code, changing a status value, or listing all existing QR codes.
Automating the boot process
Now that our bot works with multiple people at the same time, we need to make sure it starts correctly and stays online while we still need it. To host the bot, I’ve decided to use my repurposed computer running the latest version of Debian, which I use as a sort of NAS.
The advantage of doing this is total control. I can decide whether I want the process online or offline, where to store the data, and modify it at any time. To make things easier, I set up a cron task to automatically execute the script on startup.
You can also use systemctl to manage it as a service (like an app) instead of a task (the script alone), but I found cron to be easier for this use case

To execute the script, I used python’s virtual environnement (venv) system in order to import pip packets (extra libraries) without disrupting the whole server’s packet manager :

The libraries required for the bot are stored in the requirements.txt and can be installed using pip install -r requirements.txt To install it into the virtual environment you first need to activate it using source name-of-virtual-env/bin/activate
Actually using the bot
Once the backend is finally finished—usually after multiple attempts and about ten ChatGPT prompts asking it to tweak a code snippet—you can finally relax and use the bot as intended.
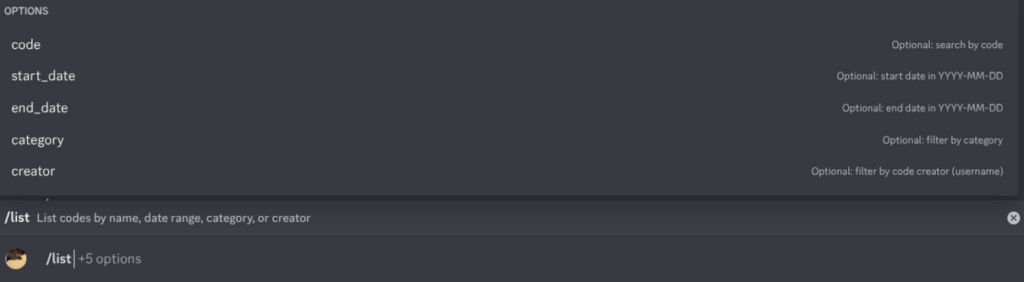
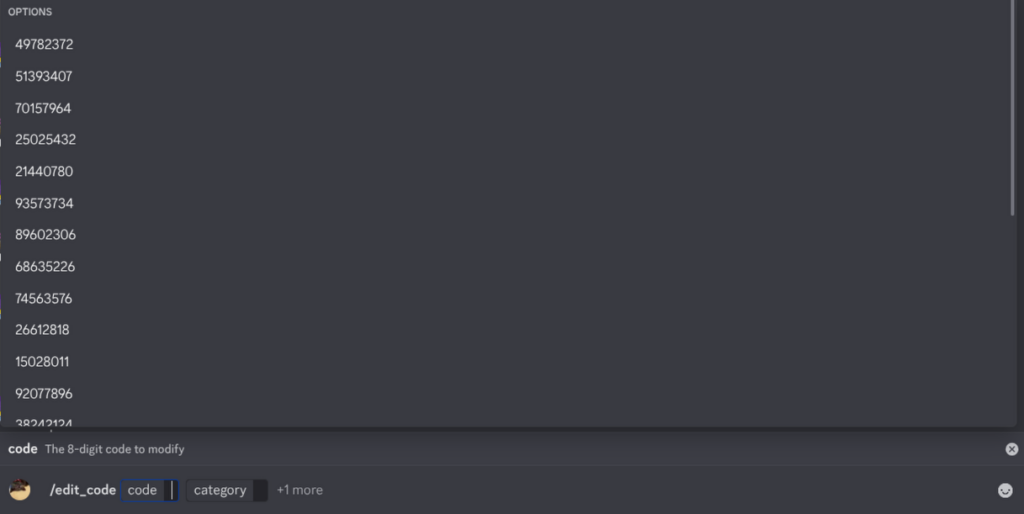
So, what can you actually do with it? You can generate new QR codes (each with a unique 8-digit identifier), list all existing codes and filter them by user, date, or category, edit a code if a mistake was made during validation (or if a friend forgot to do it), and even shut down the bot once everyone is done using it for the day.
In conclusion
This project, on its own, isn’t particularly useful. The chances of randomly finding a working code—even after scanning large numbers of them—are comparable to trying every possible PIN combination or manually brute-forcing a password: it’s slow and inefficient.
However, the real value of this project lies elsewhere. It’s about understanding how QR codes work and why they’re so widely used, learning how to build a functional Python Discord bot from scratch, and recognizing the importance of user experience in driving adoption.
I hope this post encouraged you to experiment, explore new projects, and learn something along the way. Feel free to leave a comment if you’d like to add anything or suggest a topic we could dive into next time.